Saturday, February 26, 2011

ABED Recipe: Soft Cheese Bread

I recently made the Soft Cheese Bread shown in Peter Reinhart's Artisan Breads Every Day, with some success.  Overall, it's a very, very tasty loaf of bread, if quite rich.  I won't quote the amounts used in the recipe, but I will show the cost of each ingredient.


Mise en place

Recipe
Unbleached Bread Flour: $2.12
Salt: $0.03
Brown Sugar: $0.23
Lukewarm Water or Beer
Milk: $0.22
Instant Yeast: $1.42
Melted Butter: $1.04
Chopped Onions: $0.77
Cheese: $5.04
Ingredients Total: $10.87

Putting it together was not at all difficult, though some preparation is involved: chopping onions and warming water/beer and milk.  I used beer: Twisted Pine Raspberry Wheat, which is a dark, flavorful brew I'd had a few times at the brewery itself.  Just mix the salt, sugar, and flour together; dissolve the yeast into the milk and beer; and add that and the melted butter to the flour mixture.  Mix until moistened, let it rest a few minutes, knead it a few minutes, and add the chopped onions.  The stand mixer had a bit of a problem with the load, as there's quite a bit of dough in there, so I had to knead the onions into the mass by hand.  It then goes into the fridge for an overnight fermentation.

The dough after 16 hours in the refrigerator

The next step was a little more challenging: dividing it in half and rolling half out into a broad rectangle, then shredding all the cheese and sprinkling it on top.  I used sharp cheddar along with a little bit of cubed Gouda and shaved Parmesan and Romano cheeses.  It then gets rolled up and shaped as a loaf, batard, or rolls not unlike sticky buns

The dough rolled out and covered in cheese


Cheesy rolls, pre-proof
Big, cheese-filled batard, pre-proof

Cheesy rolls, proofed and ready for baking
Batard ready for baking
Shaping the dough was a challenge, as you can see; I didn't get as tight a skin as I'd have liked on the batard.  Even so, after quite some time baking it all (I did the rolls first, then the batard), it came out well: the onions seem to have dissolved into the crumb, and there's a very nice sharp, cheesy flavor to the whole loaf.

One cheesy roll on a plate

A gigantic, cheesy torpedo
My only real complaint is that this bread is extremely rich.  I had a couple of slices once the loaf had cooled, and it filled me up for the rest of the day.  Hence, it's not a real sandwich loaf (unless you're from Wisconsin).  Even so, it's extremely delicious.  Next time I make it, I'll cut the recipe in half.

Total Cost: $10.87
Cost Per Serving: (3 oz./serving, approx.) $0.54

Closest Packaged Analog: Pepperidge Farm Cheese Bread
Cost: $5.25
Cost Per Serving (One 2 1/4" Slice): $0.88
Ingredients: Unbromated Unbleached Enriched Wheat Flour, Flour, Niacin, Reduced Iron, Thiamin Mononitrate, Riboflavin, Water, Partially Hydrogenated Soybean Oil, Yeast, Salt, High Fructose Corn Syrup, Wheat Gluten, Yellow Cornmeal, Malted Barley, Sugar, Vegetable Mono And Digycerides And Soy Lecithin. Garlic Spread Made From: Margarine, Colored With Beta Carotene, Vitamin A Palmitate, Butter, Partially Hydrogenated Soybean Oil, Dehydrated Garlic, Garlic Powder, Natural Flavors, Parsley, Annatto/Turmeric, Lactic Acid, Oleic Acid, Salt And Xanthan Gum.

The homemade version is cheaper, most probably tastier, and has fewer things like High Fructose Corn Syrup and Soy Lecithin in it.  What would you rather put into your body?

Tuesday, February 22, 2011

Sticky Buns

The name sounds like a condition rather than a dish, but they're delicious.  I used the King Arthur recipe for both the dough and the glaze, with a few alterations.

(See this post if you haven't already.)

Recipe: The Dough
1 packet or 2.5 tsp instant yeast - $1.15
7 - 9 oz. lukewarm water
12.75 oz. AP flour - $0.96
3 oz. unsalted butter, room temp - $1.56
1.25 oz. white granulated sugar - $0.08
1.25 oz. salt - $0.05
0.62 oz. dry milk - $0.39
1.5 oz. instant mashed potatoes - $0.29
Total for dough: $4.48
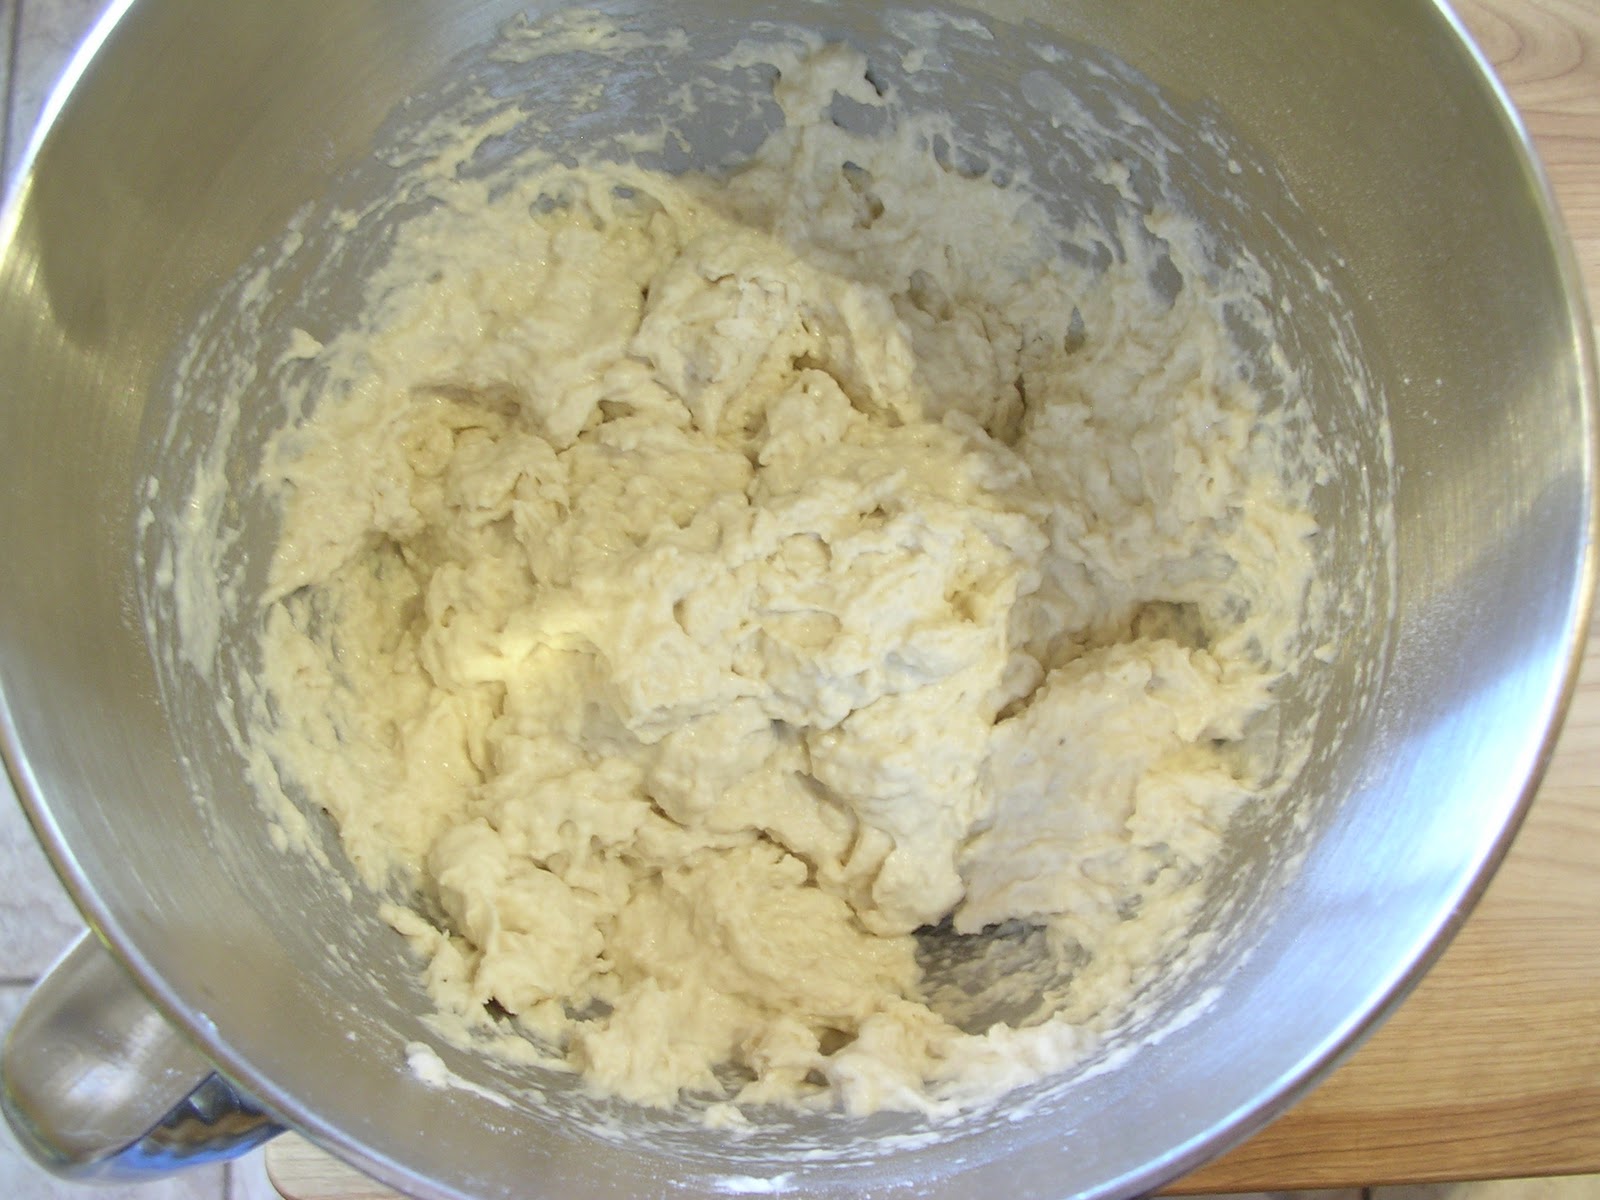
Mise en place
I first mixed all the dry ingredients for 30 seconds to incorporate them, then added the butter and warm water.  As I live in a dry climate, I put about 8.5 oz. of water in there to get a dough that was tacky, not sticky.  After a couple of minutes of mixing with the paddle, I switched to the dough hook and kneaded it for five minutes until it became a smooth, shiny ball.  After that, it went into an oiled container for a couple hours to rise to about double.
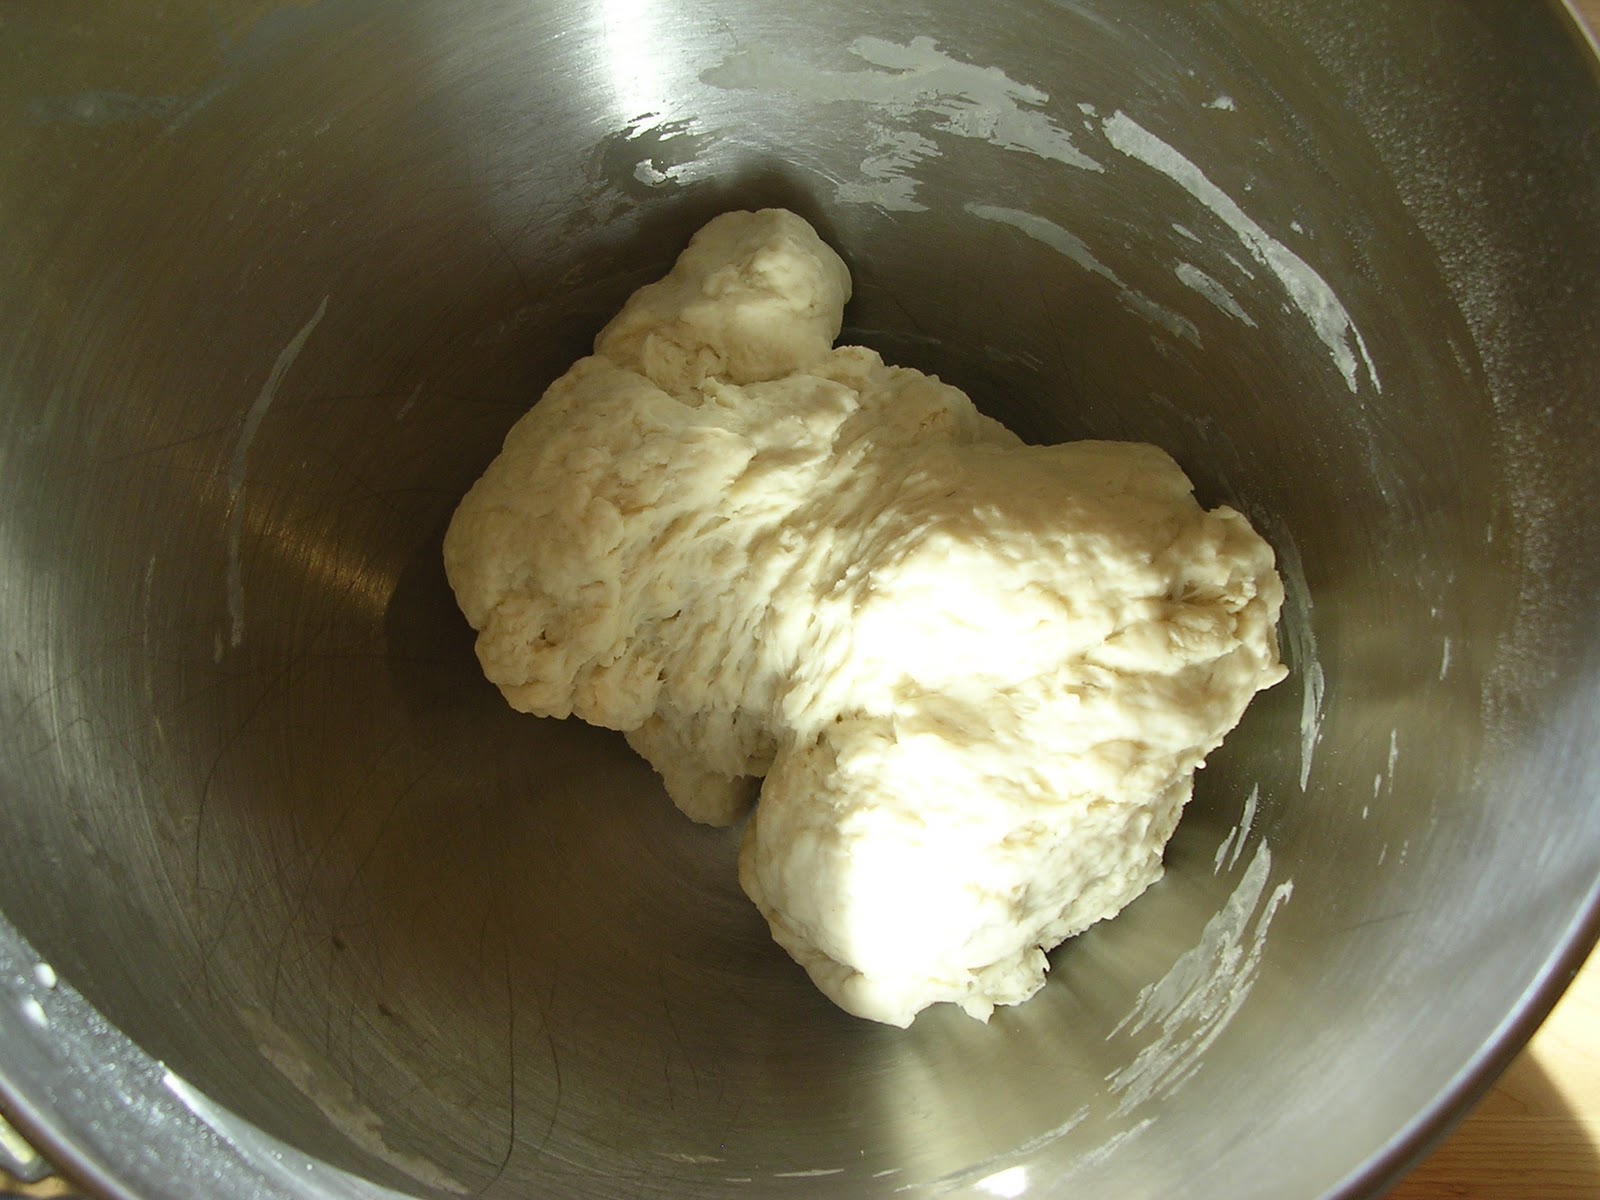
Dough, pre-rise
Mise en place
While the dough rose, I prepared two nine-inch cake pans by spraying them with Pam, then made the glaze.
Recipe: The Glaze
3 oz. honey - $1.08
2.5 oz. maple syrup - $0.48
.5 oz. rum
1.5 oz. unsalted butter - $0.78
7.5 oz. light brown sugar - $0.75
4 oz. chopped walnuts - $2.92
Total for glaze: $6.01

I made the glaze a little differently from the printed recipe, which called for all maple syrup or corn syrup.  Too much maple syrup, and the glaze tastes like breakfast.  For the rum, I used Malibu coconut rum, though I'm not sure if its addition added significantly to the quality of the end product.  One other change I made was replacing the called-for pecans with walnuts, which I already had in the pantry.  The glaze couldn't be easier to make: just whisk the melted butter, honey, rum, and maple syrup together, then divide it into the two pans.  Then sprinkle half of the brown sugar and nuts onto each pan, and set them aside.

One of the two prepared pans
 Recipe: The Filling
3.5 oz. white granulated sugar - $0.23
2 tsp. cinnamon - $0.07 (1 tsp of cinnamon weighs approximately .0972 oz.  At $0.38/oz., it costs a little more than 3 and a half cents per teaspoon)
Total for filling: $0.30

Once doubled, I put a Silpat onto my work surface, sprayed it with Pam, and patted the dough out into a 16" x 12" rectangle.  This proved to be very easy in two shifts (a ten minute break in-between gives the gluten time to relax so it doesn't fight the last few adjustments).  I used the Silpat mostly as a guide for measurement, as it has the same rough dimensions, and it's easier to clean oil off of it than the work surface I use.  I then sprinkled the filling all over the dough except for about an inch-long strip along the bottom.  From there, I rolled it up and made marks along its length so that I could get sixteen equal pieces.

Unbaked buns in the pan, pre-proof
Slicing isn't difficult: use a sharp serrated blade and let the weight of the knife do the cutting as you saw through.  Clean the blade a few times as you go so it doesn't get hung up, then place eight slices onto each prepared pan, trying to get them equidistant from each other.  Let them proof for an hour to 90 minutes, or until they're all touching in the pan.  From there, bake them for fifteen minutes, drape aluminum foil loosely over the tops, and bake them another fifteen to twenty, or until they're done.  You may want to put a pan on the rack under the buns as they bake to catch any glaze that bubbles up over the edge of the pan. Don't let them over-bake; the middle ones may not darken as much as the ones on the edge, but if they have some nice color on them, they're done.

Taking them out and flipping them over presents a very mild challenge: put the aluminum foil you draped over the top onto the counter, then place your rack upside-down on the surface of the buns still in the pan.  Over the aluminum foil, flip the pan upside-down and set the rack, now right-side up, onto the aluminum foil (which will catch dripping glaze).  The glaze sets up rather quickly, so scrape any remaining glaze and nuts from the bottom of the pan onto the buns as fast as possible.  You may want to leave the second pan in the cooling oven while you unmold the first so that the glaze remains hot and in its most liquid form.

Sticky buns just unmolded from the pan

A sticky bun, once cooled

Exploded view: note the swirl from rolling up the dough

One criticism I've heard about the glaze is that it sets up too firm, making a stiffer caramel.  Personally, I like it better that way, but you can adjust by adding more butter to the glaze and using less brown sugar on top.  The maple syrup adds a nice flavor to it that you don't often experience out of maple-syrup-specific desserts like maple candy, but as I mentioned before, too much in the glaze and you're in French toast territory.  The crumb is nice and soft and buttery without being too rich.  I've made sticky buns in the past, but the King Arthur variety is the best I've found.

Total Cost: $10.79
Cost Per Serving (1 Sticky Bun/Serving): $0.67


Closest Packaged Analog: Entenmann's Cinnamon Swirl Buns
Cost: $7.69
Cost Per Serving (1 Sticky Bun/Serving): $1.28
Ingredients: Wheat Flour, Water, Sugar, Palm Oil, Eggs. High Fructose Corn Syrup, Dextrose, Soybean Oil. Soy Flour, Whey (Milk), Invert Sugar, Yeast, Mono- and Diglycerides, Salt, Cinnamon, Corn Syrup, Molasses, Natural & Artificial Flavors, Modified Food Starch (corn Syrup), Tapioca Dextrin, Sodium Stearoyl Lactylate, Maltodextrin, Wheat Gluten, Calcium Carbonate, Calcium Sulfate, Corn Flour, Preservatives (Potassium Sorbate, Sorbic Acid, Sodium Propionate), Rice Syrup, Butter, Baker's Cheese (Pasteurized Cultured Skim Milk, Rennet), Succinylate Monoglycerides, Leavening (Sodium Acid Pyrophosphate, Baking Soda, Monocalcium Phosphate), wheat Fiber, Xanthan Gum, Guar Gum, Propylene Glycol Monoesters, Oat Fiber, Glyceryl Lactoesters of Fatty Acids, Agar, Spice & Coloring, Soy Lecithin, Artificial Color, Gum Acacia, Sorbitan Monostearate, Citric Acid), Polysorbate 60, Caramel Color, Beta Carotene (Color).

For 52% of the price, you can have a tasty (if sugary and fatty) dessert that you made at home with your own two hands, or you can eat Xanthan Gum, Propylene Glycol Monoesters, and Polysorbate 60 with your pastry.  I used to eat Entenmann's products, especially when I lived on the East Coast.  Not anymore.

(At Oriana's reminder, I've submitted this post to Yeastspotting.)

Adjustment to the Recipe

Hi, folks:

One thing I've decided to do here is include the cost of each ingredient to the recipes and directions provided in this blog.  Things you've made at home yourself taste better than anything pre-made from a package, are better for you, and are generally less expensive.  When and where applicable, I'll try to provide a packaged analog to compare ingredients and price.  All prices, unless stated otherwise, are taken from Netgrocer.  Typically, I'll take the price per ounce of each ingredient and figure how much per recipe, item by item.  Your prices may vary some, especially if you're outside of the U.S.

Some things I won't provide the prices for, like occasional sprays of oil, pieces of parchment paper or plastic wrap, and water.  It's silly to try to subdivide all that, and not useful.  And, as mentioned before, baking requires tools.  A modest investment will go a long way toward your budget in the long run, as well as your health.  What you put into your body is your responsibility, and a vital part of good health is eating the right things that you yourself have prepared.

Friday, February 18, 2011

Easy Ciabatta

I found Jason's Quick Coccodrillo Ciabatta recipe on The Fresh Loaf, and decided to try it.  Overall, I'm very pleased with how it came out.  Light and airy, with a tender crumb and a crisp, tasty crust.  My only criticism is in how I shaped it: some of the holes are too big.  You'll see why.

Mise en place
As is always the case, it's quite a surprise that the mixture of a few powders and water can eventually become a tasty loaf of bread. 

The Recipe
17.6 oz bread flour
2 tsp instant yeast
.5 oz salt
2 cups water

I used lukewarm water, even though the recipe didn't call for any particular temperature, and mixed everything together for a minute before letting it rest for ten minutes to fully hydrate the flour.  So what you start with is a dough that has the consistency of pancake batter.

Extremely wet and gloppy

The directions tell you to mix on high speed for 10 to 30 minutes (!) with the dough hook, and during that process, the dough will come together and clean the sides of the bowl, as well as pull away from the bottom a little bit.  Well, if you say so...

The mixer going on speed 6 after one minute
After ten minutes: note how it's beginning to pull away a bit
After seventeen minutes: it's dough!
It took seventeen minutes for it to come together as advertised.  My two greatest concerns were that the mixer was walking a bit, so you can't just step away from it and take a trip to the 7-11 while it's going, and the chassis of the stand mixer started to get a little warm.  As for the first, it gave me the opportunity to clean under it a bit, so that wasn't so bad.  For the second concern, there's not a great deal of dough in there, so the motor wasn't being strained to any significant degree.  After it came together, I put it into an oiled container to let rise.  It has to triple in size, so I used a transparent plastic pitcher as the fermentation vessel so I could measure the progress a bit easier.

The loose, wet dough just poured in

Tripled in size

The dough took a little over two and a half hours to triple in size; much of the rising took place in the last hour.  After that, it was time to put it onto a floured board, divide it into three pieces, spray them with Pam, dust them with flour, and let them proof for 45 minutes while I preheated the oven to 500 degrees.  A pizza stone is mandatory.

The risen dough all poured out: note the gassiness

Divided into threes
The peel has to be heavily floured so that the delicate, wobbly loaves will slide off of them easily and not get hung up.  After the proofing, you have to pick them up, stretch them out to around 10" in length, and flip them over onto the peel so that the air bubbles are evenly distributed throughout the loaf.  I decided to use the backs of my hands to do the stretching, so after flouring them, I snuck them under the loaves, stretched them some, and gently flipped them onto the peel.  While the recipe says that the loaves have great oven spring, I was terrified about losing too much volume, so I didn't stretch them and shape them as much as I might have.  Hence the larger air bubbles. 

The loaves on the peel, pre-baking

They had to be baked in shifts, so I did the first two for seventeen minutes and the third for sixteen.

The first two loaves, fresh out of the oven
Sliced: note the gigantic air pockets

You could almost fit a golf ball through that one!

An airy, tender crumb

They came out extremely well, even though they were a bit shapeless and looked like alien seed pods.  In future iterations, I'll stretch them out a bit more and make them more rectangular.  The interior was moist, the crust delicious.  Bread doesn't get much better than this.

Tuesday, February 15, 2011

Focaccia: Pizza's Delicious Cousin

Done properly, focaccia can be one of the tastiest things you will ever eat.  It's so good that I fear once the government learns about it, it may be outlawed, so make it as often as you can.  The beauty of it is that you can personalize it according to your preferences, and because it isn't pizza, you don't have to feel as though you must put tomato sauce and cheese all over it.  There's no pressure.  But there is some work involved. 

Mise en place
The recipe I use is from Peter Reinhart's Artisan Breads Every Day.  A similar recipe can be found here: the pain a l'ancienne recipe.  It's a very wet dough, and difficult to work with.  Luckily, there's not a lot of handling, at least when it comes to shaping: we're not making free-form loaves here, but placing the dough in a pan.  Another interesting element is that it's mixed with very cold water: the fermentation is going to be slow, and take place in the refrigerator overnight.  First, mix everything together except for the olive oil.  Let it rest for a few minutes, then mix in the oil.  It should look like this:

A coarse, shaggy, wet dough

This bread uses the fold technique, so I did it in the bowl: pull the front end over the mass with wet hands and fold it over.  Then do it on the opposite side, then the sides of the dough, then tuck it into a ball and let it rest for ten minutes.  Then do it again, wait ten minutes, repeat until you've done four folds.  It's amazing how firm the dough gets after just one fold.

After the fourth fold

It then goes into the fridge overnight to ferment.  It probably won't get significantly bigger, but it'll swell a bit and show signs of gas in there. 

You can make one huge focaccia in a sheet pan, or do what I do and put the dough into cake pans.  I like to do it this way because it gives you the opportunity to have a variety of focaccia toppings (this amount of dough will fit into three nine-inch cake pans), and you can store the end product easier in gallon plastic bags.
  To do this requires some work, though: you have to line the bottom of the cake pans with parchment paper.

Use parchment paper, NOT construction paper

The easiest way to do this is trace the outside of the bottom of the pan onto the parchment paper and cut it out from there.  One tip is to draw on the side of the paper that curls up: that way, you can put the side with the ink or graphite on the surface of the cake pan instead of having the ink side up, touching the dough.  It also stays on there easier while you pray it with Pam.  Make sure the sides are heavily oiled, too: this dough is sticky.

From there, you have to divide the dough and put it into the pans.  This is where it gets a little complicated: drizzle some olive oil on top, then dimple the dough with your fingertips so that it covers at least 70% of the pan.  Then put it into a warm oven for about ten minutes, take it out and let it rest for another ten minutes, dimple it again to cover more of the pan, cover and back into the warm oven, and dimple some more.  By the second dimpling it should cover the entirety of the pan, but the third dimpling can help even it out some.


Dough in the pan, before dimpling

After first dimpling

After second dimpling: note the air bubbles

At third dimpling, all evened out

Then you let it rise for an hour to 90 minutes, or until it's about an inch high.  I always use the pizza stone, so it's a long preheat: 45 minutes at 500 degrees.  After that, it's time to top 'em and pop 'em in the oven.

Like I said, you don't have to put sauce and cheese on there, but you can if you want.  The first thing I did to them was drizzle an herb oil on top.  You can make an herb oil any way you want: your favorite herbs and spices mixed into a cup of olive oil and left to steep for a few hours.  I like the traditional American-Italian flavors, so I put in plenty of garlic powder, oregano, and basil (both dried).  Again, the point is for you to personalize it according to your tastes.  These are the three I came up with:

Herb oil and shaved Parmesan

Herb oil and "pizza" cheese

Herb oil and sliced Roma tomatoes
They should take about ten to eleven minutes in a 500 degree oven to bake through and through.  The edges should pull away a tiny bit from the sides of the pan, but if they didn't, hopefully you oiled the pan properly, otherwise they're a pain to pry out.  Any oil left on the parchment paper and the bottom of the pan should get drizzled back onto the done focaccia.  This is what they looked like after baking:

Oil and Parmesan: note the nice golden brown color on the bread and cheese 

Oil and pizza cheese: the cheese got all nice and crispy


Oil and Roma tomatoes: the tomatoes cooked just a little bit

Note the coarse, airy interior: soft on the inside, crispy on the outside


They turned out extremely well: so delicious, in fact, that they should be against the law.  Make some at home while you still can. 

Friday, February 11, 2011

Bagels, Bagels, Bagels

While one typically doesn't think of bagels as something you make at home, the bagels in Artisan Breads Every Day are far, far better than anything you'd buy in a store.  Chewy and flavorful, it's surprising how easy it is to make a professional product at home.

Day One: Mixing and Shaping

Mise en place
One thing that the recipe calls for is malt syrup for both the dough and the poaching liquid, but you can substitute honey without any problem.  To be honest, I've eaten bagels for years from New York, Philadelphia, and anywhere else you can get them, and these bagels don't suffer at all from the lack.  I've found that spraying Pam on the spoon before putting honey on it ensures that the honey slides out in its entirety instead of sticking to it.  What's a little unusual is that you need to dissolve the salt, yeast, and honey into the water before adding; my concern at first was that the salt might kill the yeast, but that hasn't been a problem.  Make sure, though, that you dissolve the salt first: dissolving the salt and honey first makes a creates liquid in the bowl (I just add everything to the measuring cup for ease of blending) that makes it impossible for you to see if the salt has fully dissolved into the mixture. 

A coarse, shaggy dough
Mix everything together for a minute, let the flour hydrate for five minutes, and mix again for a couple minutes until the dough is smooth and tacky.  It has to be a little stiff so it can stand up to being poached for a couple of minutes.  Give it an hour's rest, then get out your scale and start measuring out dough balls.  A good size for a bagel is four ounces. 

As for forming the bagels, the "professional" way is to roll out ropes of dough, taper them at the ends, moisten the ends, seal them together, and roll the seal until you have an even bagel shape.  This is quite a process.  I had great success by just pushing my thumb through the dough ball to create the hole, widening it out a bit, setting it down for a minute to rest, and widening the hole further.  The holes look big to start, but they close up a bit after rising, poaching, and baking.  Some might be a bit lopsided, but with some work evening them out, you'll have nicely-holed dough balls.

Bagels, pre-rise
Bagels will stick, so a Silpat or parchment paper sprayed with Pam is important.  Spray the tops, too, so the plastic wrap doesn't adhere to them, and into the fridge they go for an overnight rise.  The biggest challenge is clearing enough space in the refrigerator; after all, they take up a whole shelf, pretty much.  The overnight rise really gives the dough the opportunity to develop some really good flavors trapped in the flour, and for me has definitely spelled the difference between tough rings of bread and actual bagels.

Day Two: Boiling and Baking

Poaching the dough
There won't be a significant size difference from day one to day two, so don't look for one.  They'll get bigger once you boil them.  The poaching liquid is baking soda, honey (malt syrup if you have it), and salt.  Boiling is a bit of a misnomer: you poach them for a minute on each side.  You may notice that the underside of the bagels looks yellow when you flip them over: this will be due to the Pam you sprayed on the prepared baking sheet; don't worry.  Make sure you re-spray the Silpat or parchment paper with Pam before putting the boiled bagels back onto it; they'll be really quite sticky now. 

As for topping, a simple egg white and water wash, then whatever you want to go on the top.  As an experiment, I put some grated cheddar and Monterey Jack cheese on one, just to see how it would hold up.  The others just got sesame and poppy seeds.  Into a very hot oven they go: eight minutes, turn the tray, and another eight minutes, and they turn out golden brown and delicious.

Finished bagels

Poppy seed bagel
I was concerned about the cheese burning, which is why I only put it on one, but it actually created a very nice, crunchy crust on the top, even after sixteen minutes at 450 degrees.  Note that the crumb inside is dense, but not too dense: there are some pretty nice holes in there.  With a little preparation and foresight, there's really no reason to buy bagels at the store again, even if you live in Manhattan.